Key takeaways
- Write two destinations: the hose end for water on the fabric, and the recessed housing drain as its own check.
- Copy start depth, flow, and freeze steps only from the manual that matches the nameplate. The WAPC250 and the APCP-1700 do not share those figures.
- Leave the pump off a weak, damaged, or leaking cover. The WAPC250 manual warns that the cover can give way and that the pump can remove treated pool water.
- Automatic start still needs a look. Disconnect power before you move, clean, or remove the pump when that model's manual says to.
- Keep the finished check with both manuals.
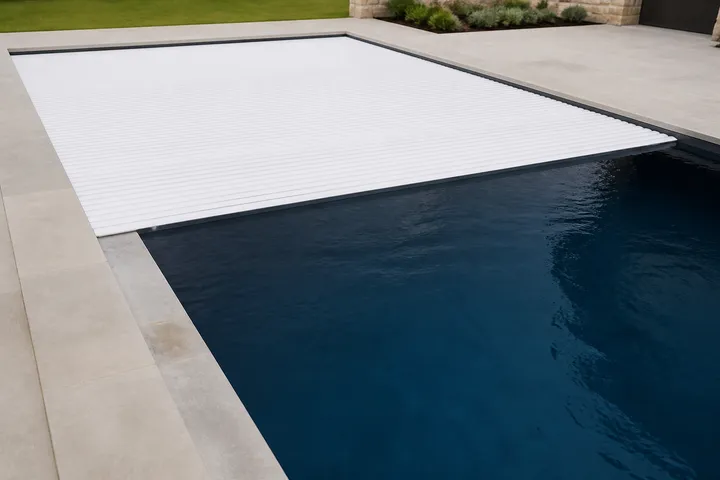
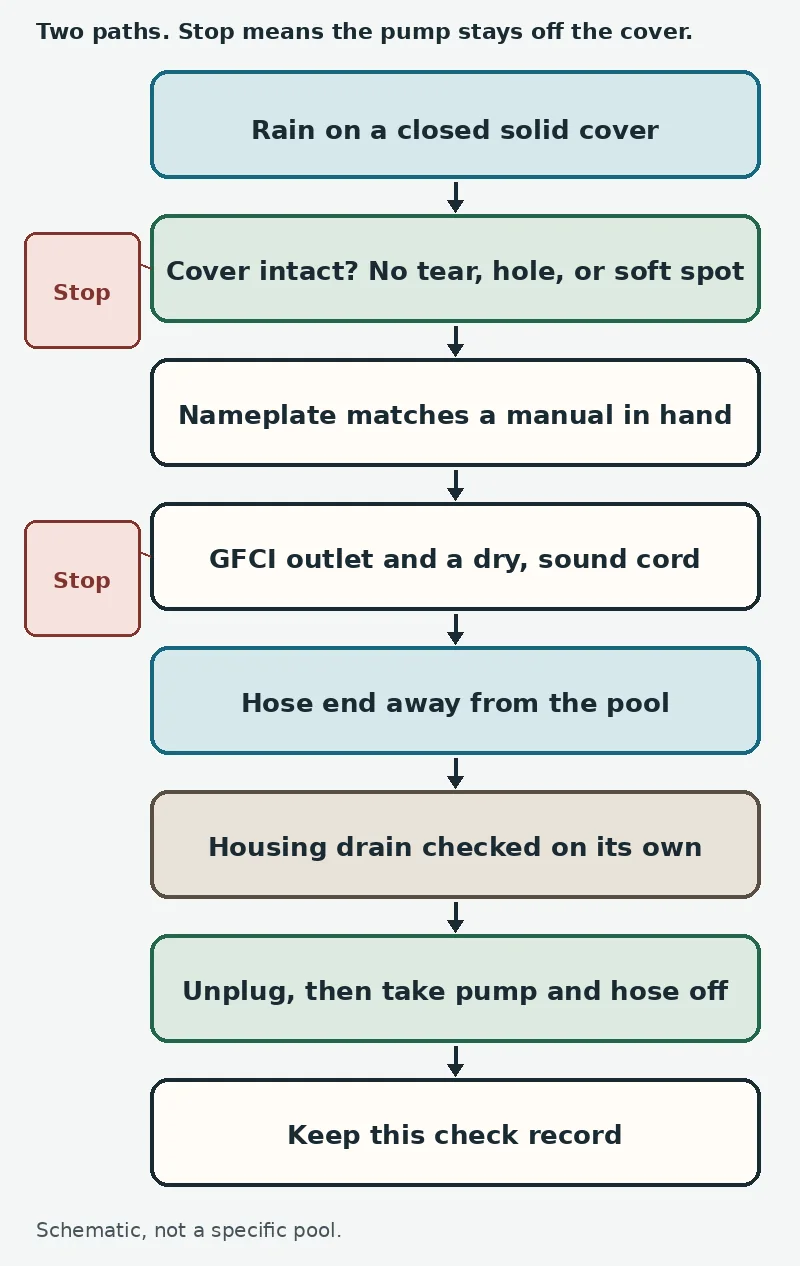
Rain on a closed solid automatic cover has to come off before you open the cover and swim. The pump is safe only for the cover under it, the outlet you plug into, and the place the hose ends. Fill in this check for the cover and the pump you actually have.
Tracks, the drive, and the housing are already covered in the complete automatic pool cover guide. Use that page when the question is the system. Use this page when the question is rain sitting on the fabric.
Keep cover water and housing water apart
Cover-Pools lists two separate care items. One is standing water on top of the cover, which you remove, and holes, which you patch as soon as you can. The other is the drain in the recessed mechanism box, which you keep free of debris. The accessories page describes the automatic water-removal pump as the device that takes water off the top of the cover.
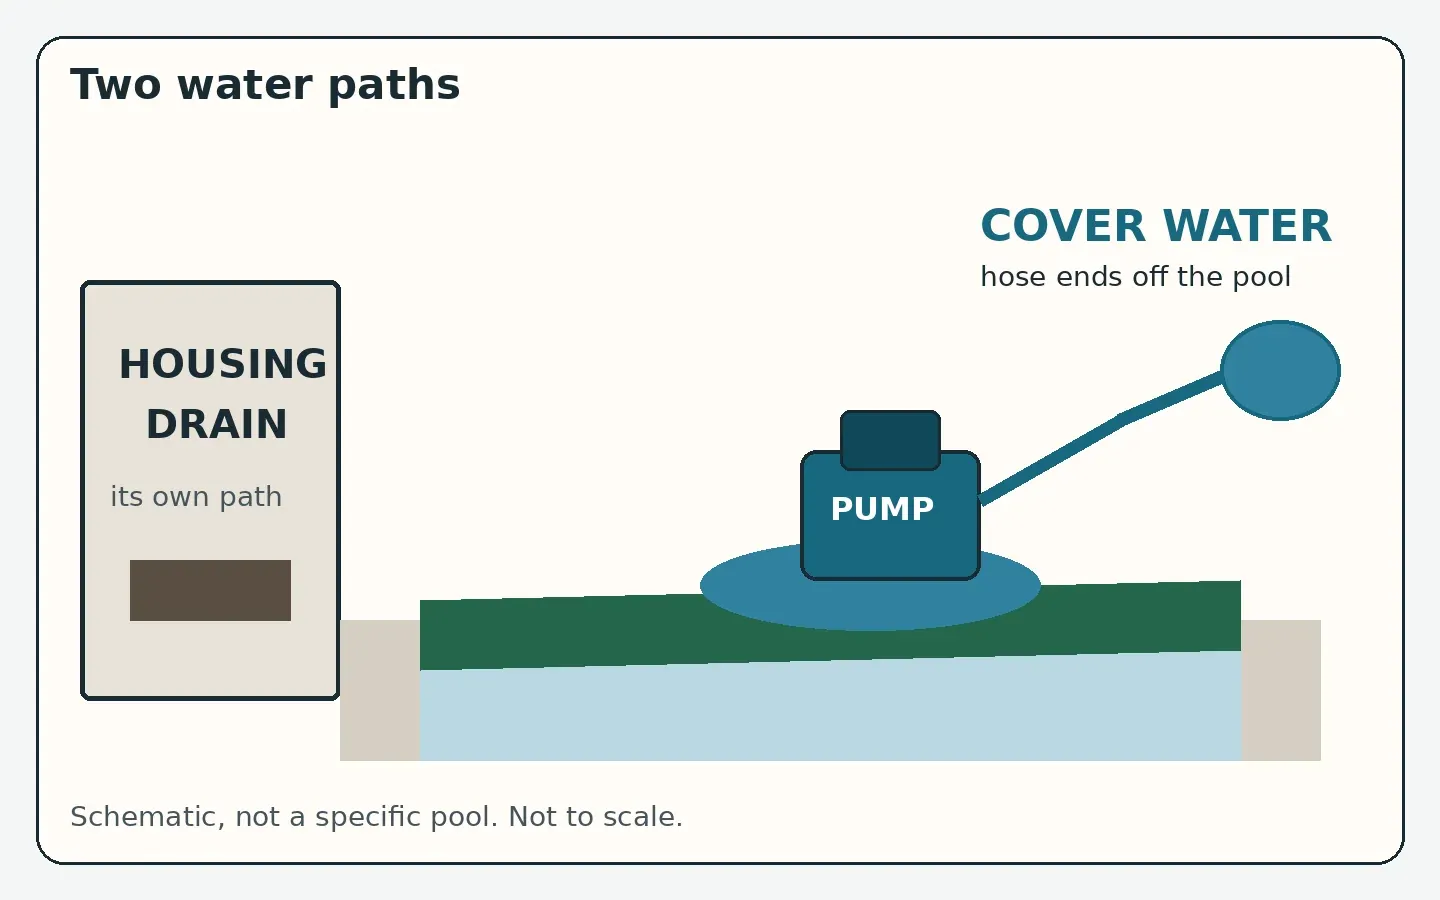
Water on the fabric leaves through the cover pump and its hose. Water in the housing leaves through the housing drain. A clear housing drain does not tell you the fabric is dry. A hose aimed into the housing puts cover water into the mechanism.
Write both destinations on the record before you plug in. One line is the hose end. The other line is the housing drain.
Stop when the cover, the power, or the path fails
The WAYNE WAPC250 manual says not to place that pump on a weak, damaged, or leaking pool cover. The cover could give way, or the pump could remove treated swimming water along with the rain. If you can see a tear, a hole, or a soft spot, or if you cannot tell, leave the pump on the deck. Have the cover maker or a cover technician deal with the fabric. Patching belongs to the cover, and this pump is not the tool that empties the pool.
That manual also limits the WAPC250 to clear water and to closed, covered pools. It says never to put the pump in a pool while people are in the water, and not to handle it with wet hands or while you stand in water or on a damp surface. It says the unit is not a sump pump and is not for septic tanks or underground vaults. Leave it out of the mechanism housing. Drying that box is the housing drain’s job, not a drop-in pump job.
The same manual says the pump must be plugged into a properly grounded GFCI outlet, and that a qualified electrician installs that outlet. There is no wiring procedure on this page. A cut, cracked, or wet cord is a stop. The manual says to replace a damaged cord immediately, and to keep any extension-cord joint dry and out of the pool. If the pump will not start and the WAPC250 chart points to low supply voltage or a defective motor, the chart sends voltage to an electrician and a bad motor to pump replacement. Breaker panels, opened cords, and motor repairs are outside this check.
The WAPC250 is sold with a 25 ft grounding cord, and the WAPC250G with a GFCI cord. The personal-safety section still requires a GFCI outlet for the unit. The cord version does not replace that outlet in the text that was read.
Name the pump before you copy a number
The two published texts do not describe one pump.
Scroll horizontally to see all columns when the table extends beyond the screen.
Scroll sideways on a narrow screen to read every column. If your nameplate is neither model, leave the number cells blank and follow the manual in your hand. A flow rate, a start depth, or a freeze step from the other column does not transfer.
The parts record for the cover, as fabric, tracks, drive, and the rest, sits on the automatic pool cover components page. The pump check here starts after that cover is already in place.
Set the pump on a cover that passed
Unplug the pump before you carry it. The WAPC250 manual says the pump starts on its own, and it says to disconnect power before you install, service, relocate, or do any maintenance. If the outlet is out of sight, the manual tells you to lock and tag it in the off position.
For a WAPC250, use this order from that manual:
- Snap on the debris strainer until it clicks. On a pool cover the manual says to use that strainer every time. It protects the fabric, strains debris, and steadies the pump.
- With the pump still unplugged, set it where the water collects. The strainer sits flat on clean fabric. Clear leaves first. Keep it off mud, sand, and leaves.
- Leave the pump upright. The manual ties the water sensor and the shaft-seal lubrication to that position. Do not run it on its side or upside down, and do not bypass the water detector. The seal depends on water, and a dry run can ruin it.
- Tie the included 25 ft rope through the pull-to-shore loop on the strainer. When you lower the pump onto an in-ground cover, the manual also shows the rope on the handle. Carry the pump by the handle or the rope, not by the cord or the hose.
- Fit the check valve with the arrows pointing up, then thread on a garden hose. The manual calls for a hose washer, which is not in the box, and it says to unwind the hose so a kink does not choke the flow. The check valve is required when you pump uphill, because water running back can refill a small puddle and start the pump again.
- In-ground figure in the manual: put the hose end away from the pool, where the water should be displaced, and keep the cord and hose off the coping so they are not pinched. Stay at or under 13 ft of pumping height. Then plug into the GFCI outlet.
- Above-ground figure: set the pump near the edge, walk around to the far side, and pull the rope until the pump sits where the water collects. If a flotation device is under the cover, the manual says to use the lowest point. Secure the rope so you can pull the pump back, then plug in.
The pump will not move water that is below its start depth. On the WAPC250 that depth is 2-1/8 inches. A thinner sheet of rain can sit there until it deepens. That wait is the control doing what the manual describes.
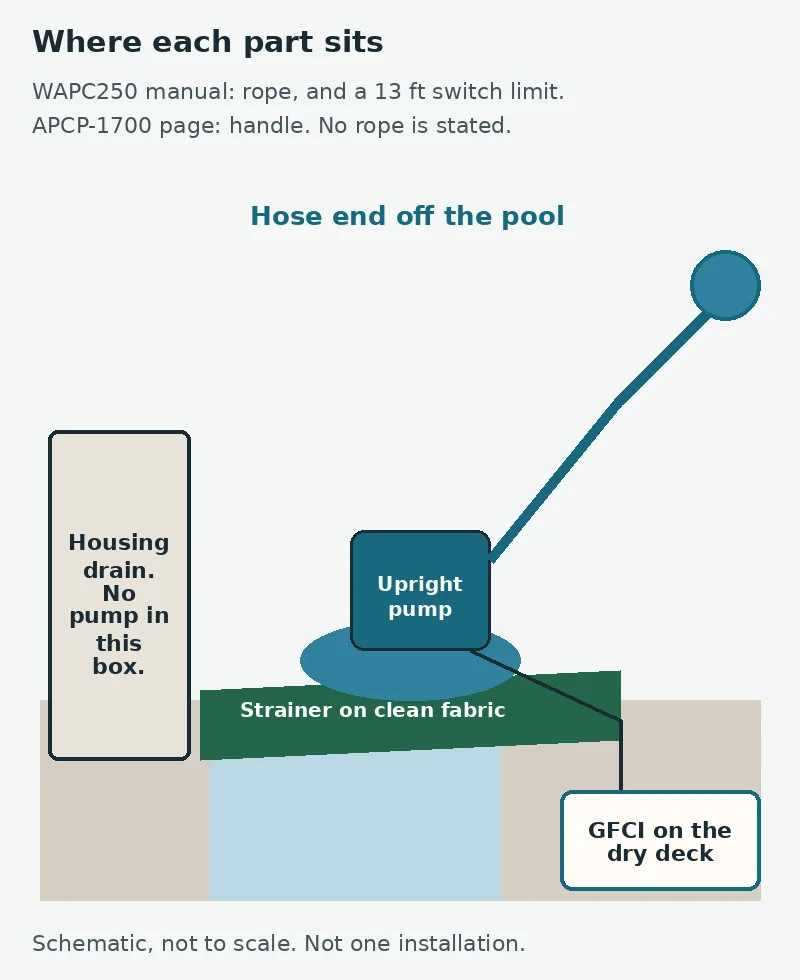
The APCP-1700 page describes a wide footprint, a low center of gravity, a built-in handle, and a 3/4 inch garden-hose adapter on a 1 inch FNPT discharge. It says the pump is made to stay upright. It does not describe a rope, a check-valve arrow, or a 13 ft switch limit. Place an APCP-1700 from its own manual, and write that manual’s name on the record. The page also says the same pump is sold for boat covers and rooftops. This check is only the solid pool cover in front of you.
Send the hose away from the pool
On the WAPC250 in-ground figure, the hose ends away from the pool. Write the real end: a yard inlet, a planter, a gutter, or another spot you can point to. If that end puts the water back on the fabric, the rain is still on the cover. Choose a different end, or stop.
Keep the hose out of the recessed housing. Then look at the housing drain the way the Cover-Pools care page describes, and write whether debris is blocking it. That is a look, not a construction job. A buried, broken, or missing drain needs the cover contractor. Opening or rebuilding the pit is outside this check.
Cover-Pools, writing about its CoverBlast nozzle, says garden hoses take deck space, often freeze, and are a tripping hazard. That sentence is about hoses. The same note says a CoverBlast throws 25 feet when it is attached to an 1800 gph cover pump. Leave those two figures on that nozzle. They are not the WAPC250 table and they are not the APCP-1700 table.
Clean the parts that manual opens
The WAPC250 manual says the motor housing is sealed and needs no internal service or lubrication. Cleaning is outside that housing: strainer, base, impeller plate, priming hole, and sensor. Disconnect power before any of it. The pump can start by itself while it is still plugged in.
The manual’s order is:
- Disconnect the pump from power.
- Remove the strainer.
- Remove the four base screws.
- Remove the base and the impeller plate.
- Clear debris and make sure the impeller turns freely.
- Put the impeller plate, base, screws, and strainer back. The plugged screen on the base sits below the switch.
- Clear the priming hole and the air-escape channel with a pin or a paperclip.
If the WAPC250 cycles on and off too often, the manual says to disconnect power, remove the strainer, turn the pump upside down, and gently scrub the sensor housing with a small brush and soapy water, then rinse with clean water. A missing or backward check valve is the other cause the chart names for short cycling. If the pump runs and will not shut off, unplug it, take the strainer off, and clear debris packed in the sensor body. Those openings are the WAPC250. The chart’s other “little or no water” causes on that model are a blocked hose, too much discharge height, and a clogged strainer, each handled with the pump unplugged.
The APCP-1700 page says routine cleaning uses the removable intake screen. It links a maintenance guide and a float-maintenance video. It does not list four base screws or a priming hole. Do not move the WAPC250 screw sequence onto an APCP-1700. For any other nameplate, stop at the step that model’s manual actually prints.
Cold weather follows the nameplate
When the temperature drops below freezing, the WAPC250 manual says to remove that pump from service and store it indoors so ice does not damage it. The liquid range printed for it is 40 F to 120 F. The same troubleshooting text describes a protection circuit: if ice or debris locks the impeller, the unit can shut off and stay off for as long as 12 hours, checking twice a day, until the impeller is free. A momentary unplug resets that delay. The circuit is a shutdown after a lock. The cold-weather instruction above it is still to bring the pump indoors. Leaving the pump on the cover because the circuit exists is not the step the manual gives.
The APCP-1700 page states a maximum liquid temperature of 140 F (60 C). It does not state a freeze procedure or an indoor-storage step. Cold storage for that model comes from the manual shipped with the pump.
A garden hose on the discharge can freeze on its own. Cover-Pools says hoses often freeze. Add the hose to the cold-weather line of the record. None of the sources read here give an antifreeze fill, a heat cable, or a “run it so it stays warm” step, so this check does not add one.
Take the pump off before the cover opens
The cover stays closed until the pump and the hose are off the fabric.
On the WAPC250, unplug first. Pull the pump in with the 25 ft rope. On the above-ground figure, disconnect the hose once the pump is at the edge, then lift it off. The manual repeats the handling rule: dry hands, dry footing, power already disconnected, and no towing by the cord or the hose.
On the APCP-1700, the product page gives a handle for placement and removal, and it says the float switch turns the pump on at 2 inches of water. It does not print an unplug sentence or a rope. Read the APCP-1700 manual for the disconnect step, then use the handle. Do not add a rope the page never mentions.
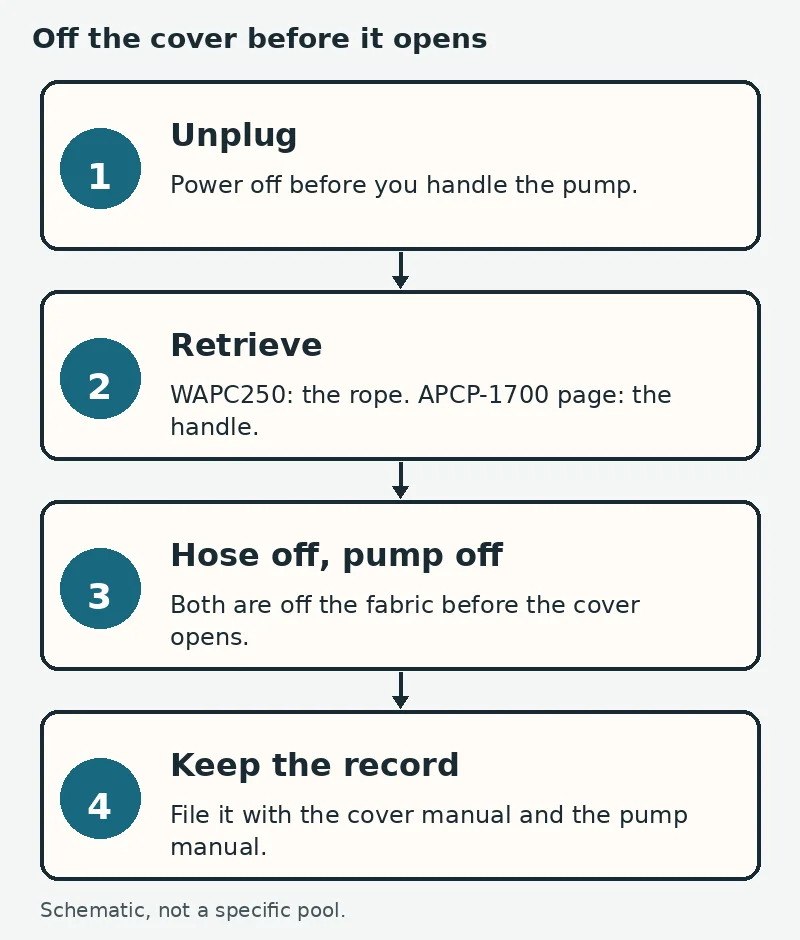
Cover-Pools says the pool should not be left unsupervised while the cover is off. Opening the cover ends this check.
Copy the check and keep it
Scroll the table sideways on a phone if a line runs long. One row, one fact. Leave a cell blank when you do not know it.
| Field | What to write |
|---|---|
| Date and person | Who looked, and the date |
| Cover | Maker, model, and that it is a solid automatic cover |
| Cover condition | Intact, or the tear, hole, or soft spot you found |
| Pump | Maker and model from the nameplate |
| Manual | Title or form number you actually followed |
| Power | GFCI outlet, cord condition, plug dry or not |
| Placement | Where it sat, upright or not, strainer on clean fabric or not |
| Cover-water path | Where the hose ended |
| Housing drain | Clear, blocked, or not inspected, and that the pump was not in the pit |
| Inspection | What you opened or rinsed, and that power was off first |
| Removal | Unplugged, how you retrieved it, hose off, pump off the fabric |
| Cold weather | What you did, and which manual stated it |
Keep this check record with the cover manual and the pump manual.
Other cover decisions are grouped with automatic pool covers. The sentences above were taken from Cover-Pools’ cover-care and accessories pages, the WAYNE WAPC250 manual 690001W-001 C, and the Little Giant APCP-1700 product page. The copies were fetched on October 11, 2026, and re-read before any operating step was written. Each depth, amp, flow, and freeze line stays with the model that printed it.
Frequently asked questions
How do pool cover pumps work?
On the two models read here, a sensor starts the pump when water on the cover reaches a stated depth and stops it when the level falls. The WAPC250 manual uses 2-1/8 inches to start and about 3/4 inch to stop. The APCP-1700 page uses 2 inches to start and below 1 inch to stop. The pump sends that cover water out a hose. It does not empty the recessed housing, and an automatic switch does not replace a look at the cover.
How do you clean a pool cover pump?
Disconnect power first. The WAPC250 manual then has you remove the strainer, the four base screws, the base, and the impeller plate, clear debris, confirm the impeller turns freely, and clean the priming hole with a pin or paperclip. The sensor housing can be washed with a small brush and soapy water. The APCP-1700 page states that the intake screen is removable, and it does not list those screws. Follow the manual for the nameplate you have.
How do you keep a pool cover pump from freezing?
The WAPC250 manual says to take that pump out of service and store it indoors when the temperature drops below freezing. Its listed liquid range is 40 F to 120 F. The APCP-1700 product page does not state a freeze or storage step. Cover-Pools notes that garden hoses often freeze, so record the hose with the pump. Use only the storage line printed for your model.
Can a cover pump empty the swimming pool?
Use it for rain on a closed, covered pool. The WAPC250 manual says not to set the pump on a weak, damaged, or leaking cover, because the cover can give way and the pump can remove treated swimming water. Cover-Pools says to patch holes in the cover as soon as possible. A leaking cover is a stop, and the pump stays off it.
Sources
- Cover Care Tips — Cover-Pools Accessed October 12, 2026.
- Accessories, including the automatic water-removal pump — Cover-Pools Accessed October 12, 2026.
- WAPC250 Operating Instructions and Parts Manual, 690001W-001 C — WAYNE Water Systems Accessed October 12, 2026.
- APCP-1700 Series Pool Cover Pump — Little Giant Accessed October 12, 2026.